


What is web scraping? How do I scrape a webpage? What are the tools used for scraping a webpage? These are questions that have been asked by aspiring data analysts, data scientists, data engineers and data practitioners. This article will provide easy, functional and actionable explanations to what web scrapping is and how to perform web scraping in 5 easy steps in python.
Let’s get started:
What is web scraping?
Web scraping refers to the process of retrieving data that is stored on websites. If you have ever gone to a website to collect data about a particular topic, you have scraped the web. However, manually going to a search engine to download all the result you got from your “images of cat” query can be extremely tedious and time consuming. The process you used to collect this data can be automated for when you need to collect large amounts of data, like the result of your “images of a cat” query.
Web scraping is a name given to the process of automating the manual task of retrieving information from a website. Web scraping is perceived to be a daunting task that can only be performed by senior programmers through countless lines of code, this assumption is not accurate. Although, scraping a website requires you to have a coding background, the task is relatively easy with tools like python, request, BeautifulSoup, selenium and many others. Textual data, image files, video files can all be retrieved through web scraping.
Now that we know what web scraping is, how exactly do we scrape a webpage?
Note, the code used in this article is provided here
How to scrape a webpage?
These are 5 easy steps to scrape a webpage using python:
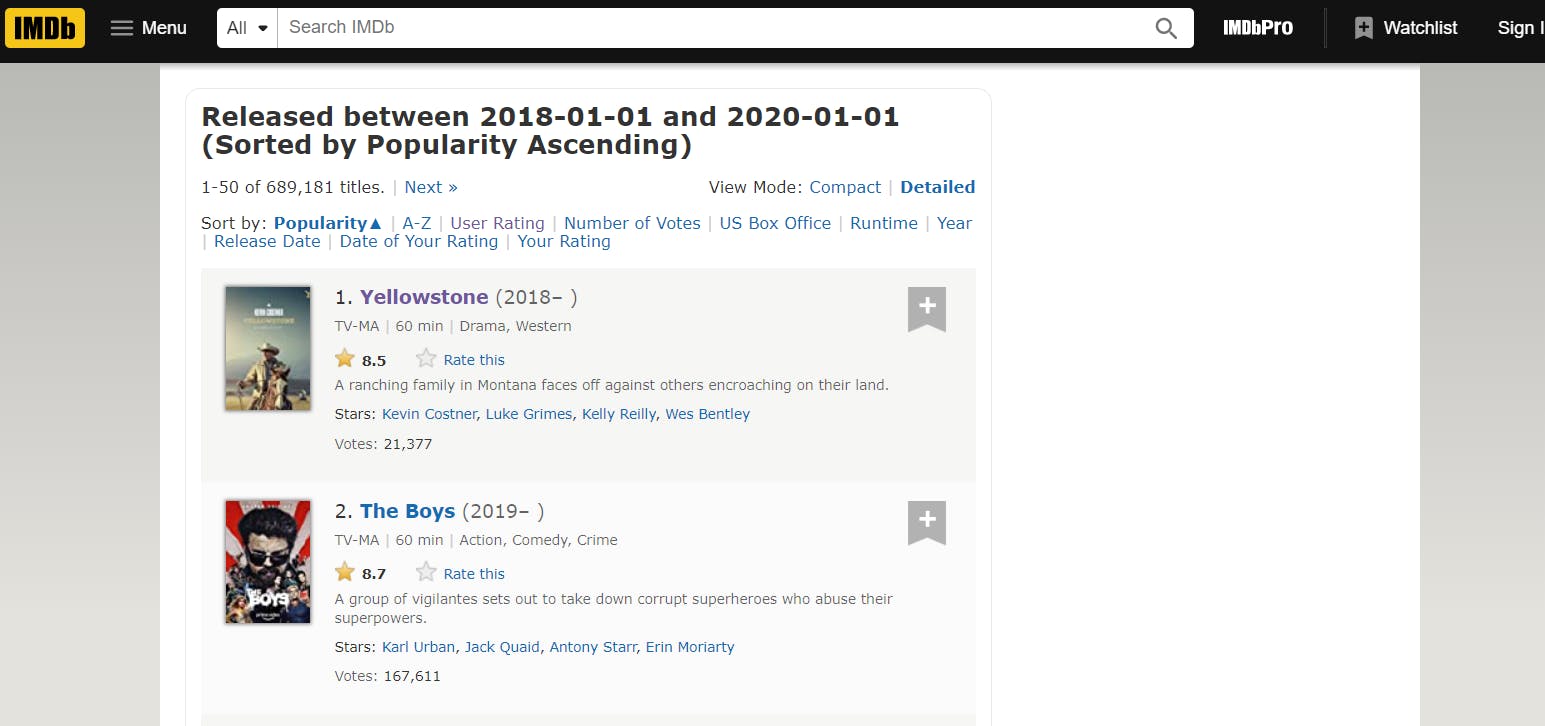
1. Identify desired webpage: Identifying a web page that contains the data one wants to retrieve is the first step in web scraping. For example, if you want to retrieve ratings and genre of movies released from the year 2018–2020, you can get this data from the IMDB website. Head-on to the site, set the filters on the search query to the desired output and the web engine will display all desired data. Where do you go from here?
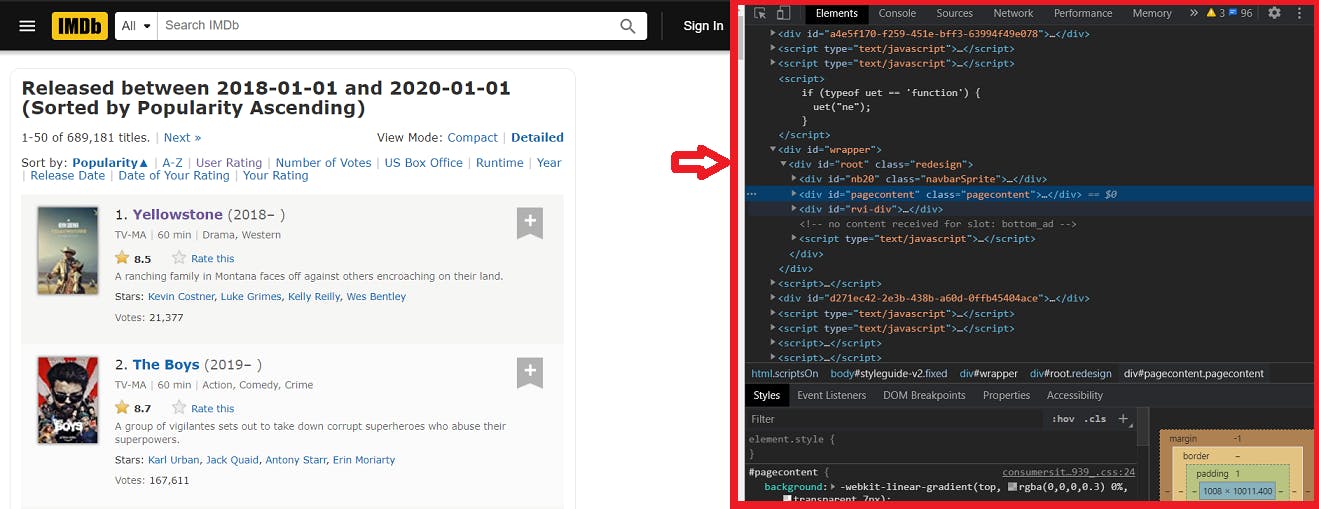
2. Study the structure of the webpage: In this step, you will need to view the source code of the page and study the html elements. There are built in tools in modern web browsers that enables users to interact with the backend of the webpage. In Chrome, you can simply right-click anywhere on the webpage and click on “view page source” or “inspect” this will launch the developers console, giving you access to the webpage backend.
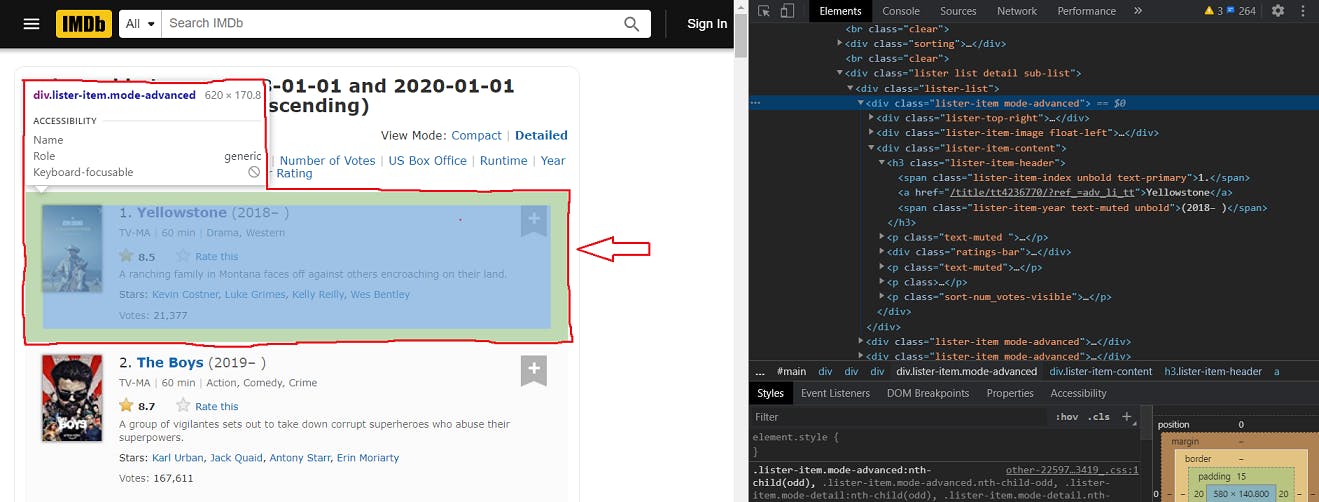
3. Locate data and HTML element tree: After carefully studying the structure of the webpage, you should be able to identify the location of the actual data you wish to retrieve. Another way to do this is to simply move the cursor to the position of your desired data, right-click and click on “inspect”, and this will take you directly to the containing html element tag. Now that we have located the desired data, we can proceed to write the efficient code to get us the data.
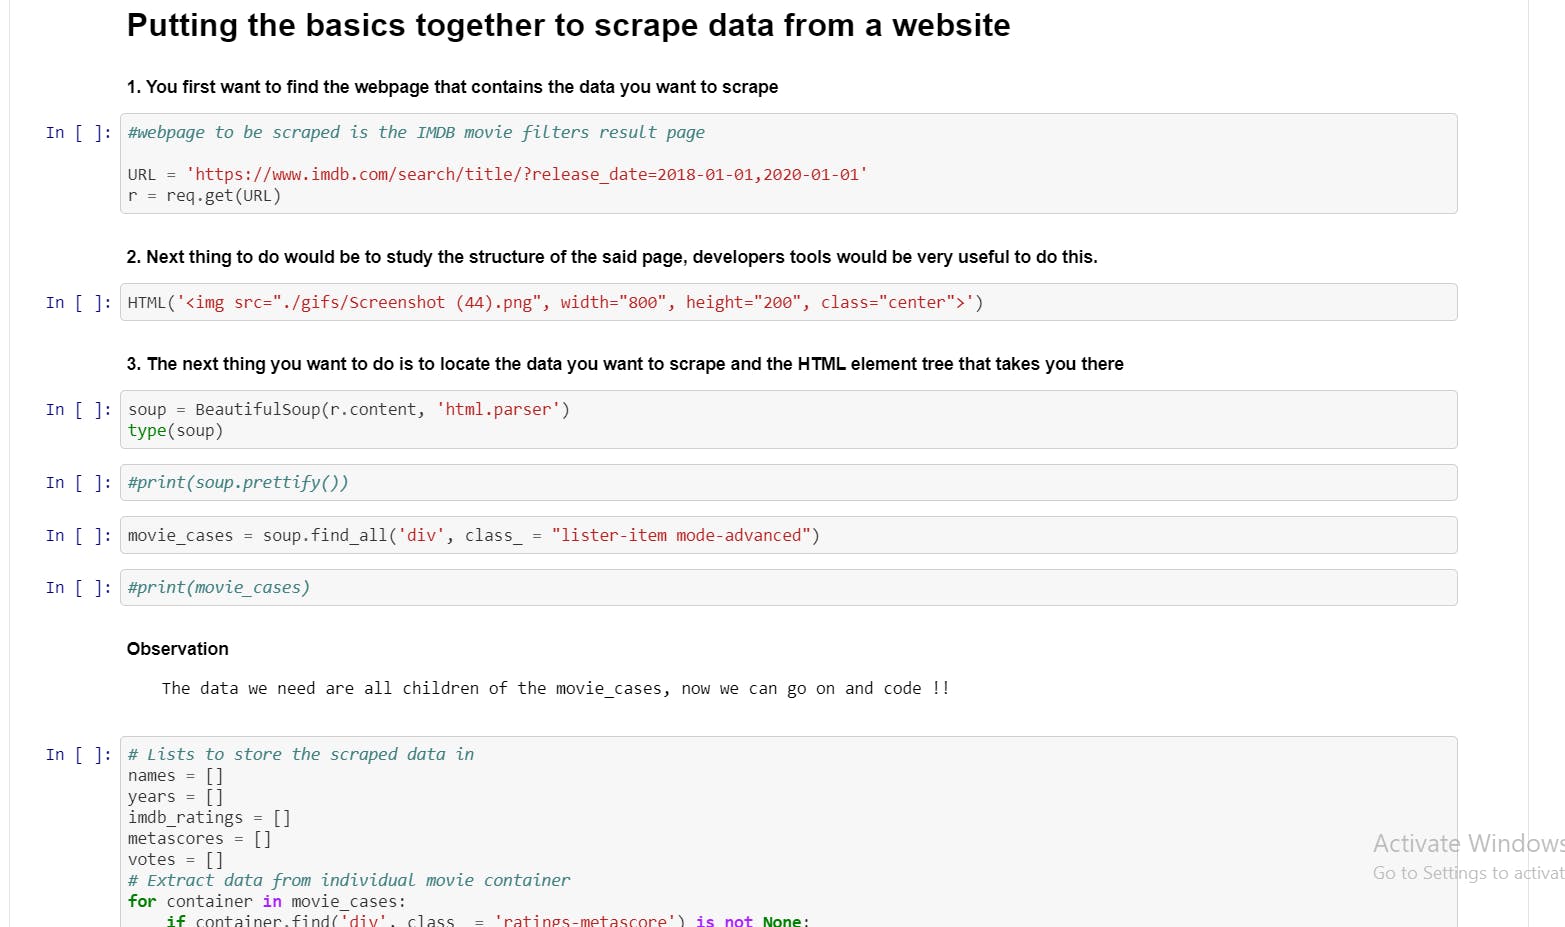
4. Write the code to retrieve the data: You are almost done, now automate all the steps from one through three, in other to achieve this, one has to be familiar with the tools used for web scraping;
Tools for web scraping
There are several python modules that can be used for scraping websites. These modules include Request, BeautifulSoup, Selenium, Scrapy and many others. For the purpose of this course, the focus will be on Request and BeautifulSoup as they are both sufficient to achieve our aim.
Request: Request is a python module that enables users to send HTTP request such as GET and POST using python code. The module is preinstalled with the python base environment and offers features such as sessions with cookies, multipart file uploads, streaming downloads, connection timeouts and many more.
BeautifulSoup: BeautifulSoup a native module that enables python to parse the HTML and XML documents retrieved through the request get method. The module needs to be installed with the command pip install beautifulsoup4 before it can be used. some of the offered features can be seen here
Now that we have the tools, we can put them to use and write the code!
5. Store retrieved data: Now that you have the data, the data can be stored in any desired format. For the purpose of this article, the data will be stored in a pandas dataframe.
feel free to give feed backs about the article. Ask questions about ambiguous concepts, and suggestions will be highly appreciated